Monday, April 22, 2013

Home made water colors. So much fun

*I wrote this post around Easter time and just forgot to share it, oops* 

My kids and I love having fun with water color paints.  The ones you buy at the store have such small paint areas and always end up being a wet, mixed up mess of colors.  I stumbled across a tutorial for making our own water colors and we just had to try it.  The actually mixing and making of the paints was so easy.  The drying/waiting part was the "hard" part.  We had to wait about a day and a half for them to completely dry and be "set".  I think if you had a space heater or other warm area in your home, they could dry faster sitting near that.  I just had mine sitting on my kitchen counter.

Now that they dried we were anxious to use them, We had a busy Easter weekend so we had to wait till after the holiday to sit down and use them. 

First, here are our water colors after we mixed them.


Here they are after the dried


And...here they are being used.  They worked GREAT!  I did find they needed a little more water to get them started then the store bought water colors.  We didn't mind at all though.  

We used white crayon to reveal a secret message. A great way to play with water colors
Want to make your own watercolors?  You can find more detailed instructions HERE

Happy Earth Day

Even though we celebrate and appreciate the Earth every day, it is nice to pay a little extra attention today.  I spent time subbing at the kids school today or we would have more fun recycling projects to show you.  We will try to fit in a few more this week. 

This particular project was completely spur of the moment...like 10 minutes ago.  I got home and was browsing on facebook and someone had shared a link to THIS blog.  What a cute project...right?  

I quickly searched for a container we could use out of our recycling bin.  I found this small little sour cream container.  It is smaller then I was hoping for but for a quick project, it was just perfect.then I

So, here is our container. You can see that I had already started taking the print off.  I just used a Mr. Clean magic eraser and it came off fairly easily.  Just a little elbow grease needed ;-)  

Next, I used an exacto knife to cut the top rim off.  I just waned a neater edge to work with.   Next I used a hole punch and went around the edge.  I got a little too close to the top a few times but I made it work. 


 I let my little lady pick out the color yarn for the top and then I crocheted around, decreased a little towards the top, added handles and a drawstring.

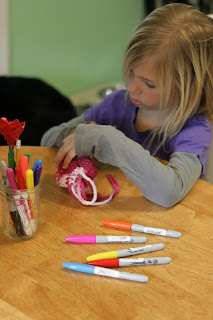
Working hard on her design.

 She made a beautiful spring scene.  I love her self portrait, her flowers and her butterfly.

 SO happy with her new little purse/container.  I am sure she will store many of her treasures in here.