Thursday, May 22, 2014

Lady Mary Sun hat

I just adore this new hat pattern by Danyel Pink Designs. I was in love the first time she posted about it. I couldn't wait to make one. I purchased the pattern as soon as it was released but have been so busy, today was my first chance to make one.

I was on a field trip with my daughter today and I knew the bus ride was going to be quite long so I took yarn with me. This outfit match up happened completely on accident.

She was already wearing the orange bow in her hair today and the pink yarn just happened to be the color I had enough of. When we got home, I was looking for a dress for her to wear with it and to my surprise she had this perfect pink and orange sun dress.

I am pretty sure this is my new favorite outfit for her, it definitely is my new favorite hat!

Enter code: ready4summer for 15% off your purchase of a custom Lady Mary sun hat.
Lady Mary Sun hat, purchase HERE


Visit Danyel's pattern store if you would like to purchase this pattern. 
Lady Mary Sun Hat Pattern, purchase HERE

Saturday, May 17, 2014

Teacher Appreciation

I love my kids teachers and I love being able to make something special for them.  Teacher Appreciation weeks is a really fun time to get crafty.  
This year I saw this cute little Pot Cozy Pattern and just knew that is what I wanted to make.  I always try to include the cultural arts teachers so I had a lot of cozy's to make.


 I made 8 different pot cozy's.  Picking out the color combinations was a lot of fun.


 I had 3 extra pots so I made more cozy's for them and they are sitting in my kitchen window.  I think my favorite is the red/white/blue one.  I think I will make many more of them for the upcoming holiday!  


I always like to do a little something extra for the two "main" teachers.  Afterall, they do have to put up with my little lovelies a lot more!  I found this little Market bag pattern and thought they would be perfect.  I love how they turned out!


Now, it is time to start thinking of some "end of year" gift ideas!

FREE Pattern: EOS holder

I designed this little holder last summer.  The EOS lipbalms were new and very popular. I sold a bunch of these at my craft fair and have made many for gifts.  I just love them!

Here is what you will need:

- Cotton yarn (I used Lily Sugar n Cream)
- G/4mm crochet hook
- Keyring (if making the key ring version)
- Yarn needle or weaving in ends and embroidery


Here is the pattern:  

- Start with magic ring
- Use stitch marker (do not join)

Rnd 1: 6 sc in ring (6 sc)
Rnd 2: 2 sc in each sc (12 sc)
Rnd 3: BLO, sc in next sc, 2 sc in next, around (18 sc)
Rnd 4-10: sc in each sc around (18 sc)

Necklace Version
Rnd 5:  join with slst in next sc, ch desired length, join to sc on opposite side. FO

Keychain Version
Rnd 5: join with slst in next sc, ch 5, join to keyring with a slst, work 1 sc in the ring, sl st, ch 5, join to sc on opposite side. FO

Optional:

- Add a decorative button or embroidery!

ENJOY!!


Making our own Sidewalk chalk

A friend of mine told about a fun, easy recipe to make your own sidewalk chalk and I just had to try it.  Gloria and Landon had a blast with this.  The recipe is easy but just to warn you, it ends up being more like paint....so fun to use though!

All you need to make this is some water, corn starch, food coloring and a muffin tin.  No cooking involved, SO EASY!

Mix together 1 cup of water and  1 cup of cornstarch
Poor a little bit into each of the holes in the muffin tin.  I was able to fill 9 of them about 1/2 way.
After you have them filled up, add your food coloring to each hole to desired color.  
Take it outside with some paint brushes and have fun :-)

The cornstarch does settle so be sure to STIR each color well pretty much every time you are using it.  you will feel the thickness and notice a difference it how it works.

This was after we added the food coloring, we left one white.

Landon's happy little face after he made his first mark on the sidewalk.

My little artist, she adored this!

Making a butterfly.  I need to invest in some bigger paint brushes.  I highly recommend BIGGER paint brushes for this project.  I only had my tiny little ones, made making these big drawings much more time consuming.


Gloria's butterfly.  They loved how it went on really wet and dried like chalk.  It was pretty cool and so pretty!


Landon's masterpiece


Landon decided it was cool to paint his arm too.  It WAS actually really neat. It would run down his arm all liquidy and then dry like chalk, he enjoyed watching the change happen.


We will definitely be doing this project many more times this summer!

Friday, May 16, 2014

Making some changes....for the better!

I am as guilty as the next person.  I get sucked into social media!  I go to Facebook to share a link, post a picture or an update and I end up browsing the news feed and loosing track of time.  Don't get me wrong, I LOVE Facebook and the opportunities it has brought me.  I have made new friendships (which I cherish), reconnected with old friends and it has been a huge help with marketing my business.  I do not plan to stop using Facebook but I am hoping using this blog as a creative outlet to share my life's happenings, that maybe I will not feel it as necessary to go to Facebook as often as I do now.

I started a blog a LONG time ago and then started another one for my crochet business.  I just haven't kept up with both.  It is a lot of work but it is also a great way to journal and reflect.  I am going to use this blog to talk about my life/family, my crochet business and some fun crafts.  Keeping it all together will be much more manageable for me I think.

I wish there was a way to go back and blog about all the things I didn't blog about so I can keep it all together.  All I can do is start here, and try to keep it together this time.

 I moved some of my older "crafty" blog posts over here.

To make things easier I have added several pages to my blog.

FREE patterns:  Here you will find the links to any of the free patterns I have posted as well as some links to my favorite free patterns I have found on line.
Getting Crafty:  Here is where I will organize the links to my crafting blog posts.
Photography: Here is where I share my love for photography and a few of my amature photo sessions.
Mel's Crocheted Creations:  This page tab will take you directly to my store envy store front
Bundle of Joy Props:  This page tab will take you directly to my Etsy store.

Homemade Finger paints

Running low on paints?  Make your own, that's what we did.  Really, this was just a fun, easy project to do with Gloria.  She loves making things and this recipe was perfect for her to take control of and do on her own.  I gently guided her with the measurements but for the most part, she made these all by herself.

Here's what you need: 
3tbsp sugar
1/2tsp salt
1/2 cup corn starch
2 cups water

Here's what you do:
Combine ingredients in small saucepan
Warm until mixture thickens (this took longer then expected)
Cool and pour into jars.  We used mason jars but baby food jars would be the perfect size.
Add food coloring to make desired colors
ENJOY!

Gloria's little hand stirring the paint.


Adding our colors

Blue, Purple, Yellow and Red.  These were fun to make and fun to use.  


Keep in mind that they are made using food coloring and some minor, temporary staining will occur, LOL  

Scavenger Hunt

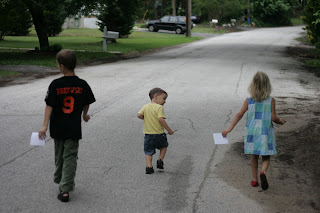
It was a cloudy rainy day, perfect day for a scavenger hunt.  I printed out a free sheet I found and off we went.  They all loved it and we walked all the way around the neighborhood.


Gloria on the move, already spotting stuff.


He was quick to spot quite a few of the items. 


Landon enjoyed this most of all.  He thought it was the best thing EVER!  lol


He spotted something :-)


HAHA, he kept running and his pants were falling down.

Gloria's card all complete


This is the printable we used.  You can print this out and you cut it out, there are 4 total cards on one sheet. 


HAVE FUN!